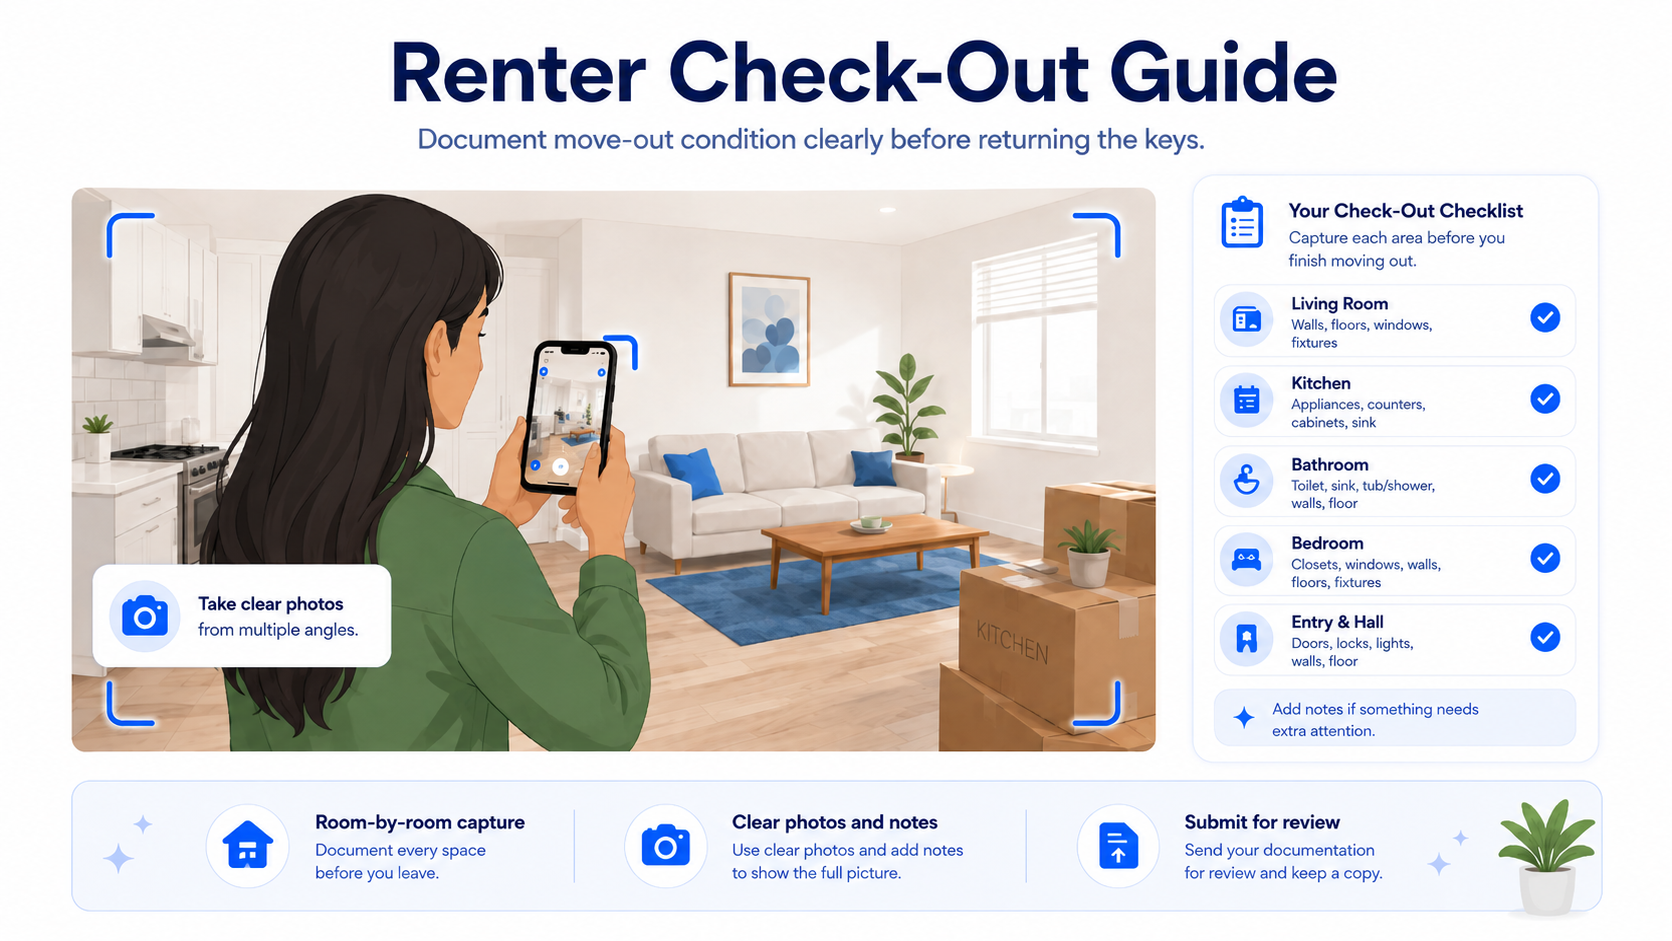
A clear renter check-out helps create a better move-out record. Renters can document each room before returning the keys, while landlords still review the final inspection record.
Move-out can be stressful for renters and landlords
The renter wants to leave the property clearly documented. The landlord wants to understand the final condition of the property. Both sides benefit when the move-out record is organized, factual, and easy to review.
That is the purpose of a renter check-out. A renter check-out is not about arguing over damage. It is not about making final claim decisions. It is not about replacing the landlord’s review.
It is about creating a clearer move-out record before the renter returns the keys.
PropCheckAI is designed to support this kind of workflow:
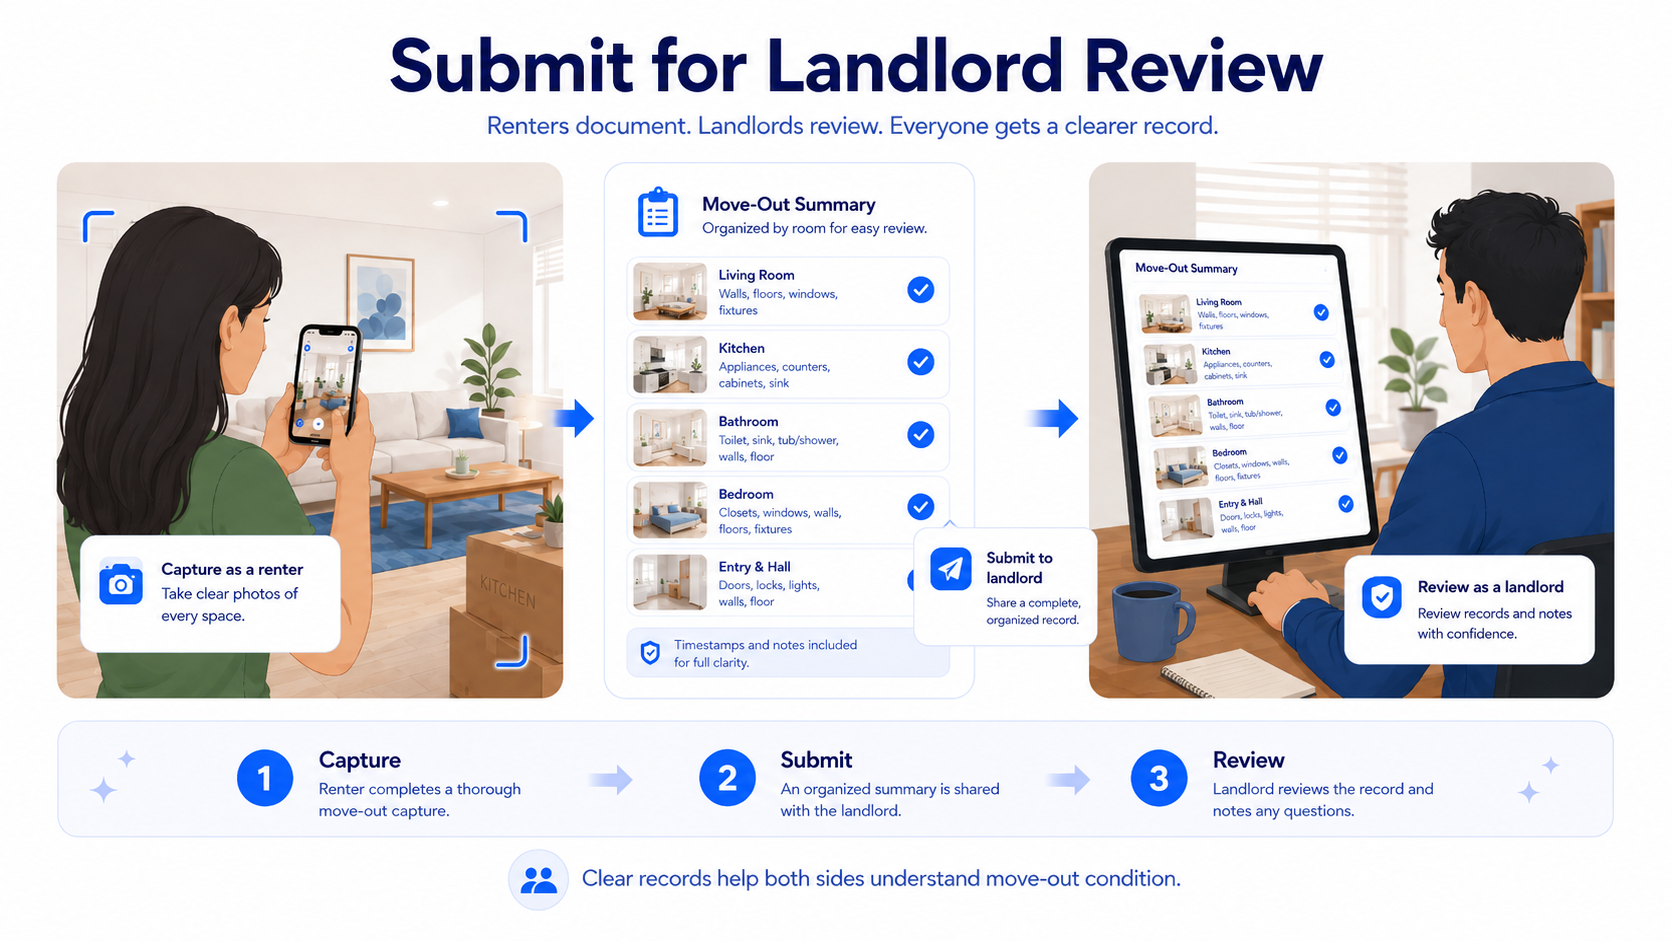
Renter captures checkout condition→Record stays organized by room→Landlord reviews the result
The renter documents.
The landlord reviews.
Everyone gets a clearer record.
Why renter check-out documentation matters
A renter is usually the last person living in the property before move-out is complete. That makes the renter’s checkout record useful. Before the keys are returned, the renter can document the condition of the rooms, surfaces, fixtures, appliances, and included items. This creates a move-out record that can be reviewed later.
Without a structured checkout, documentation often becomes scattered. A renter may send photos by text message. A landlord may have move-in photos in a folder. Notes may be in an email. Some rooms may be missing. Some images may not be labeled. Later, everyone is trying to understand what was captured and what was missed.
A structured renter check-out helps avoid that confusion. It keeps the record connected to the property, the room, the inspection type, and the review process.
A renter check-out should stay factual
A good renter check-out should focus on condition, not blame. The goal is not to write emotional notes or make legal claims. The goal is to document what the property looks like at checkout.
Good renter notes are short and factual.
Use wording like:
“Small mark visible near living room baseboard.”
“Kitchen counter cleaned before checkout.”
“Bathroom sink and mirror captured after final cleaning.”
Avoid wording like:
“This is not my fault.”
“The landlord cannot charge me for this.”
“Everything is perfect.”
“The room was already destroyed.”
Factual documentation is easier to review. It also keeps the checkout record professional and useful.
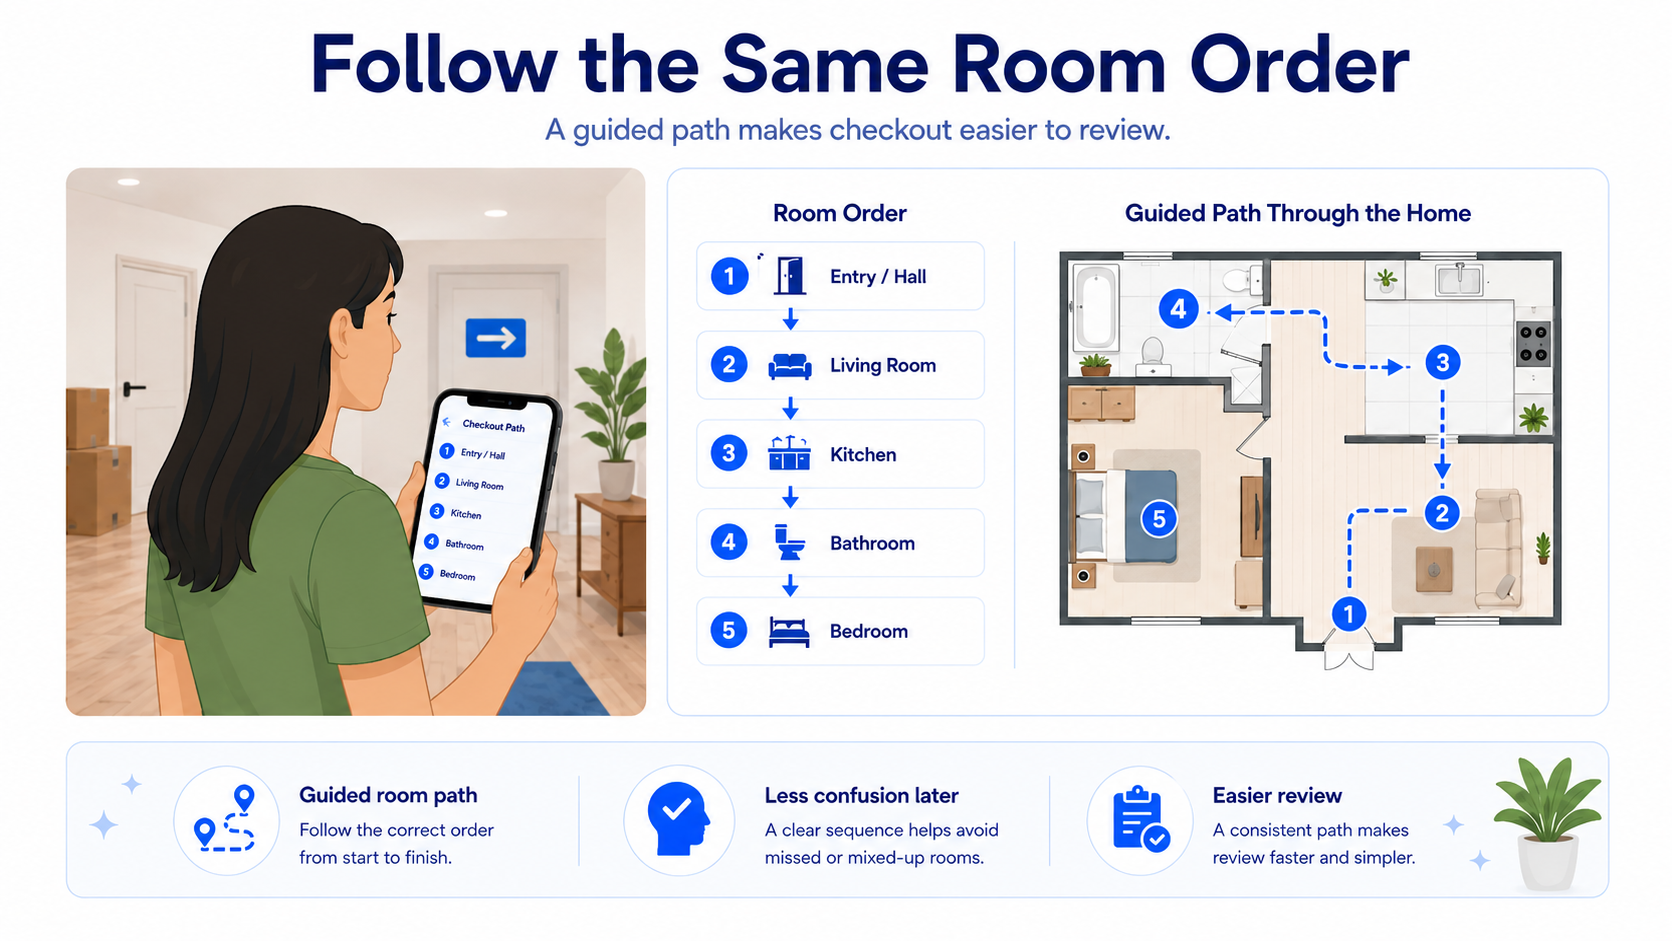
Follow the same room order
A renter check-out is stronger when it follows the same room structure as the original inspection. Random photos are harder to review. A guided room order is much easier.
For example:
Entry / hallway
Living room
Kitchen
Bathroom
Bedroom
Balcony, garage, storage, or outdoor area
The exact room order depends on the property. The important part is consistency. When the renter follows the same room order, the landlord can review the checkout more easily. It becomes clearer which rooms were captured, which rooms need attention, and whether anything was missed.
This is especially helpful when the move-out record will be compared with the move-in baseline.
The checkout should match the baseline when possible
The move-in baseline is the original condition record. The renter check-out is more useful when it follows that baseline. This does not mean the renter has to recreate every photo perfectly. Real move-outs are busy. Lighting changes. Furniture moves. Boxes may be present. Cleaning may still be happening.
But the closer the checkout follows the original structure, the easier the review becomes.
Helpful habits include:
use the same room order
capture the same main surfaces
stand in similar areas when possible
include wide room views
capture important details
add notes when something needs context
The checkout record should help answer one main question: What did the property look like when the renter moved out?
Capture each room clearly
A renter check-out should be room-based. Each room should have enough photos or frames to show the general condition.
Important areas include:
walls
floors
doors
windows
locks
light switches
cabinets
counters
appliances
sinks
toilets
showers and tubs
mirrors
included furniture
storage areas
balconies or outdoor spaces
The renter should capture both wide views and important details. Wide views show the full room. Detail views show areas that may need closer review. Both are useful.
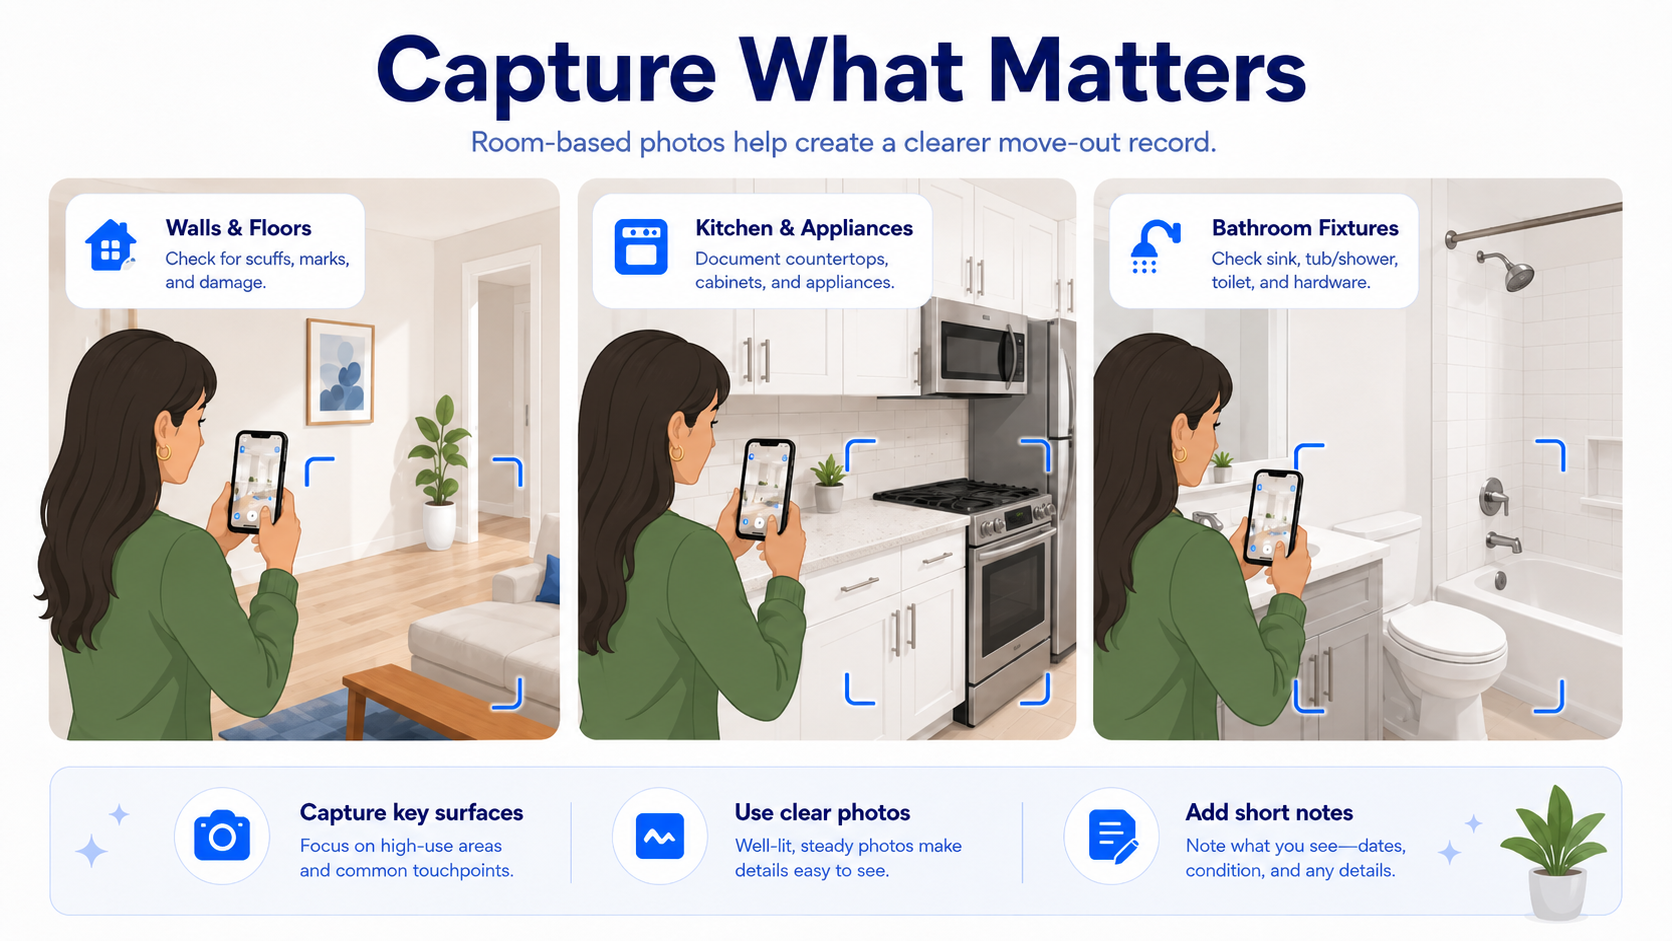
Capture what matters
Not every corner needs twenty photos. The goal is useful documentation.
A strong renter check-out should focus on areas that commonly matter later.
Walls and floors
Capture full wall views, baseboards, areas near doors, floor surfaces, carpeted areas, and visible marks or stains.
Kitchen and appliances
Capture countertops, cabinets, cabinet doors, sink and faucet, stove, oven, refrigerator, dishwasher if included, and visible appliance condition.
Bathroom fixtures
Capture sink, faucet, toilet, shower or tub, mirror, tile, cabinet or vanity, towel racks, and visible hardware.
Use clear photos
Clear photos make the checkout easier to review. A blurry photo may not help much later. Simple habits can improve the record:
hold the phone steady
use good lighting when possible
avoid extreme close-ups unless showing a detail
include enough context around the area
take wide room views first
add detail photos second
avoid covering the lens
retake photos that are too dark or blurry
The goal is not professional photography. The goal is a clear condition record.
Add short notes when needed
Photos show the condition. Notes explain the context. A renter does not need to write long paragraphs. Short notes are usually better.
Useful notes may include:
what room the issue belongs to
what area the photo shows
whether cleaning was completed
whether something was already present
whether something needs extra attention
whether an item was included or removed
Good examples: “Entry wall scuff near door.” “Kitchen counter captured after final cleaning.” “Bedroom closet empty at checkout.” “Bathroom mirror and sink captured before key return.”
The note should describe what is visible. It should not overclaim.
Document included items
For furnished rentals or properties with included items, the renter check-out should document what remains in the property. This can include furniture, lamps, remotes, small appliances, keys or access devices, mattress covers, curtains or blinds, outdoor furniture, storage items, and included accessories.
Missing item questions are much harder to review if the item was never clearly documented. A renter check-out can help show what was present at move-out. This is useful for both sides.
Capture after cleaning when possible
If the renter is responsible for cleaning before leaving, checkout documentation is usually better after the final cleaning is complete. This gives a clearer view of the final condition.
If the renter captures too early, boxes, supplies, trash bags, or cleaning items may block important areas. A better checkout sequence is to remove personal items, complete cleaning, walk through each room, capture wide room views, capture important details, add short notes, and submit the record for review.
This makes the record easier to understand.
Submit the record for landlord review
The renter check-out does not need to be the final decision. It should be submitted for review. The landlord or responsible reviewer can then look through the organized record, compare it with the baseline if available, ask follow-up questions if needed, and decide what belongs in the final report.
This keeps the process clear. The renter captures. The landlord reviews. The final report stays controlled.
Why this helps renters
A structured renter check-out gives renters a clearer way to document move-out condition. Instead of relying on informal photos or memory, the renter has a room-based record.
This can help renters show what condition the property was in at checkout, which rooms were captured, when the checkout record was created, what notes were added, what was present before leaving, and whether cleaning was completed.
This does not guarantee any specific deposit outcome. It does create a clearer record. That is valuable.
Why this helps landlords
A renter check-out also helps landlords. Instead of receiving random photos by message, the landlord can review an organized checkout record. This makes it easier to understand which rooms were captured, what condition was documented, whether any areas need follow-up, whether the checkout seems complete, whether the record can be compared with the baseline, and whether notes or additional review are needed.
The landlord still controls the final inspection review. But the renter can help capture useful move-out information. This reduces the landlord’s burden and keeps the inspection process moving.
What a renter check-out should not do
A renter check-out should not create confusion about final decisions. It should not claim that the renter approved the final report, agreed to charges, that the landlord accepted all conditions automatically, that the checkout guarantees deposit return, that the record proves legal responsibility, or that the app makes legal decisions.
The purpose is clearer documentation. The renter creates a move-out record. The landlord reviews it. Both sides get a better starting point for understanding property condition.
What a strong renter check-out includes
A strong renter check-out should include:
room-by-room capture
clear wide photos
detail photos where needed
short factual notes
timestamped documentation
organized room labels
included item documentation
checkout after cleaning when possible
submission for landlord review
Renter check-out works best as part of a full inspection system
A renter checkout is most powerful when it connects to the rest of the inspection process. That means the landlord creates the property record, the move-in baseline is captured, the room order is defined, the renter follows the checkout path, the renter captures move-out condition, the renter submits the record, the landlord reviews the checkout, findings are confirmed or dismissed, and the final report is generated.
This keeps the process organized from start to finish. The renter does not need to manage the full inspection system. They simply follow the checkout path and document the condition clearly.
The best move-out process is not about surprise. It is about clarity. Renters benefit from having a clear way to document the property before leaving. Landlords benefit from receiving organized records instead of random photos. Both sides benefit when the checkout record is easier to review.
A better move-out record can reduce confusion around what was captured, when it was captured, which room it belongs to, what condition was visible, what notes were added, and what needs review.
That is the real value. Clear documentation helps everyone understand the move-out condition, and it supports more organized inspection reports later.
Important Disclaimer
PropCheckAI helps users create, organize, compare, and review rental inspection documentation. PropCheckAI does not provide legal advice, does not guarantee dispute outcomes, and does not make legal or financial decisions for users. Users remain responsible for reviewing inspection results and deciding how reports are used.
Ready to make move-out documentation easier to review?
PropCheckAI helps landlords and renters create structured checkout records, compare before-and-after condition, review findings, and generate organized inspection reports.